Grab Up To 70% Off In Our January Sale!
Flash Deal + Extra 10% off Showers With Code SHOWERS10. Ends:
How to Fit a Kitchen Tap
How to Fit a Kitchen Tap
Switching up your kitchen tap is the perfect way to upgrade your space, but how should you actually go about fitting the new tap? Our step-by-step guide gives you the simple breakdown
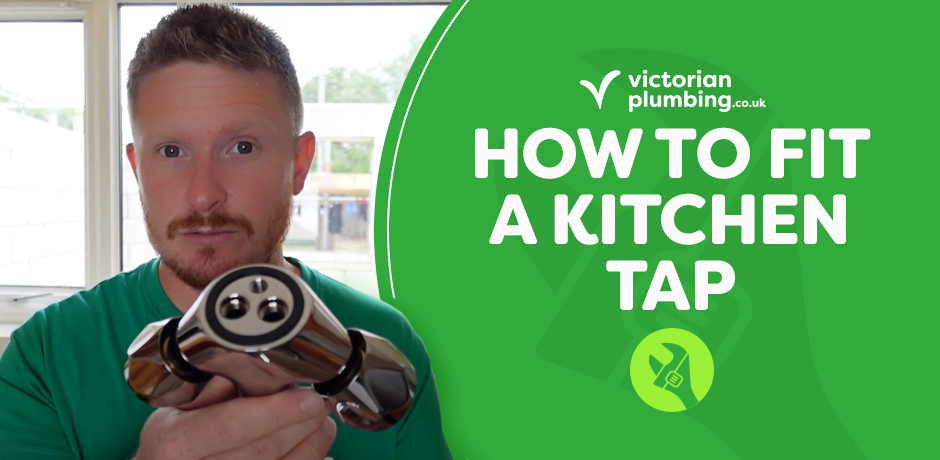
Whether you’re in the middle of a whole kitchen remodel or just looking to give your sink a glow-up, upgrading your kitchen tap is a crucial step. A shiny new tap can become the star of your kitchen, but installing it can sometimes be a tricky job.
That’s why we’ll be going through a simple, step-by-step method for fitting a new kitchen tap. Take some of the stress out of renovating your kitchen by following this guide, either through the video or written-out steps below.
What You Need
Before you get started, make sure you’ve got everything below.
-
New tap
-
Hot flexible tap connector
-
Cold flexible tap connector
-
Tap fittings
-
Flathead screwdriver
-
Box spanner
-
Normal spanner
You’ll want to make sure that the box spanner matches the size of the nut that comes with your new tap fittings.
How to Fit a Kitchen Tap
Check out the video for a short but comprehensive guide to fitting your new kitchen tap, or read on for a written-out version of the steps.
Fitting a Kitchen Tap: Our Step-By-Step Guide
1. Fit the O-Ring to the Tap
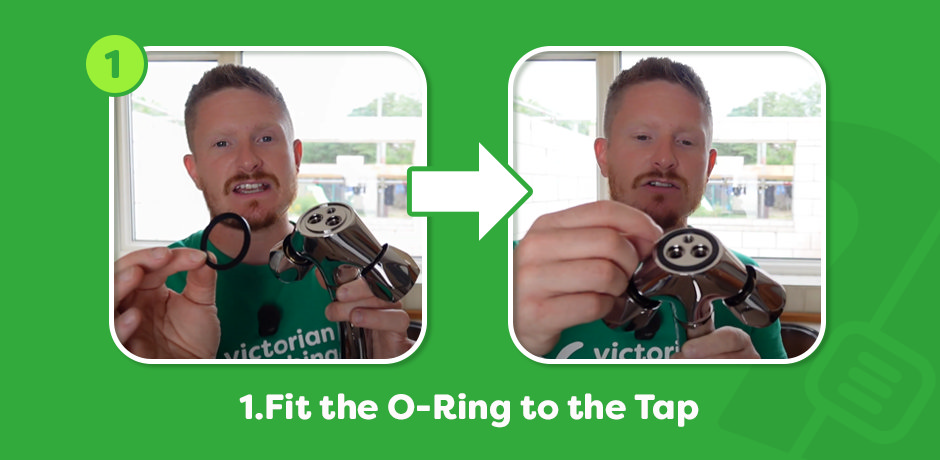
Your new tap fittings should include an O-ring that will fit around the base of the tap. It’s important to put this in place, as it can prevent leaks once you’re using your tap. Otherwise, water can run down from the tap and into the cabinet below your sink.
2. Fit the Flexible Tap Connectors to the Tap
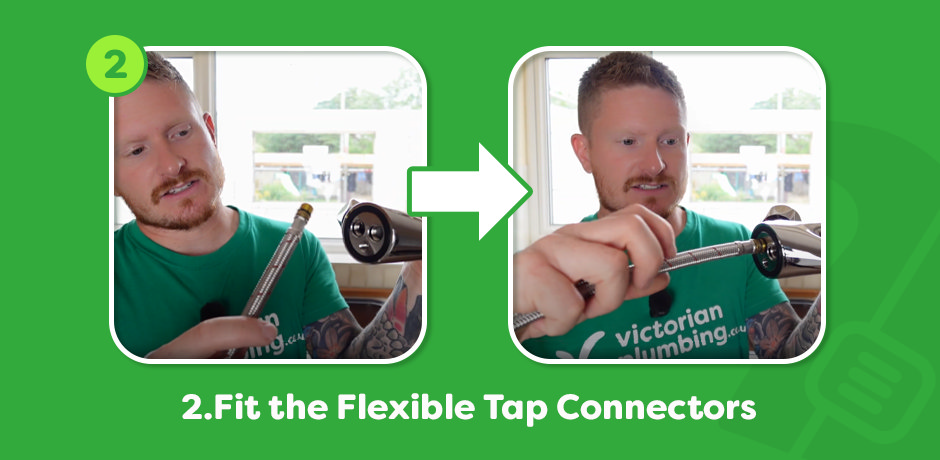
Your tap should also come with two flexible tap connectors: a hot one and a cold one. Hand screw them into their respective sides of the base of the tap, and make sure they’re tightly secured.
3. Fit the Threaded Rod to the Tap
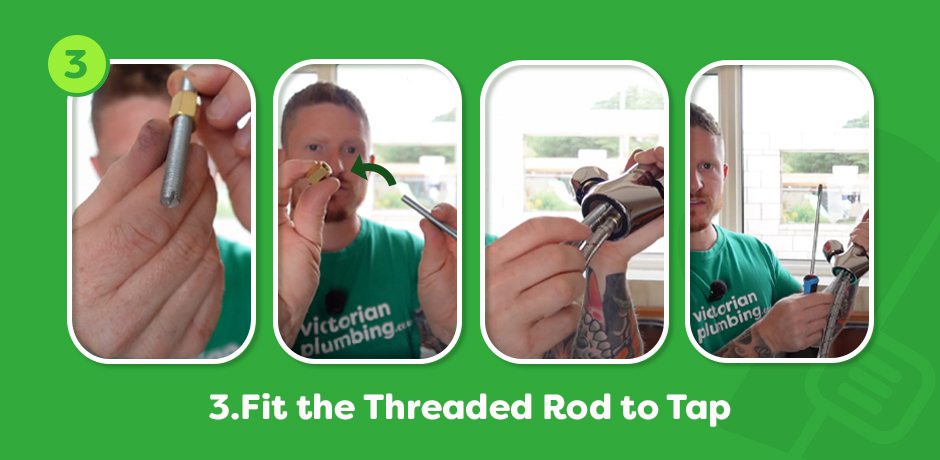
Taking the threaded rod from your tap fittings, remove the nut from the rod. One end of the rod should have a slot for a flathead screwdriver, so insert it into the base of the tap with the slot facing outward. You can then use a flathead screwdriver to tighten the rod.
4. Push the Tap Connectors Through the Hole in the Sink
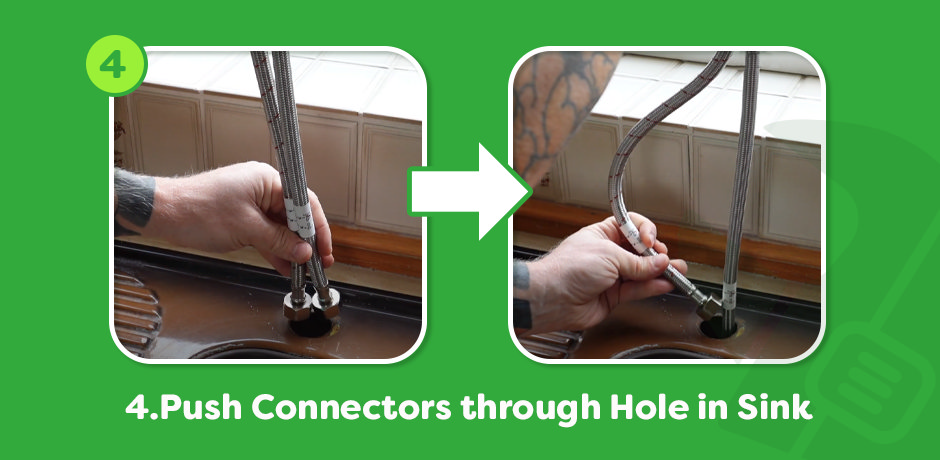
Moving the tap above the hole in your sink (where it’s going to be fitted), you’ll notice that you can’t push both of the tap connectors through the hole at the same time. All you have to do is push one through, then the other afterwards, and feel free to bend either connector if needed. Once they’re both through, you should be able to lower the tap fully into place on the sink.
5. Attach the Fixing Kit to the Underside of the Tap
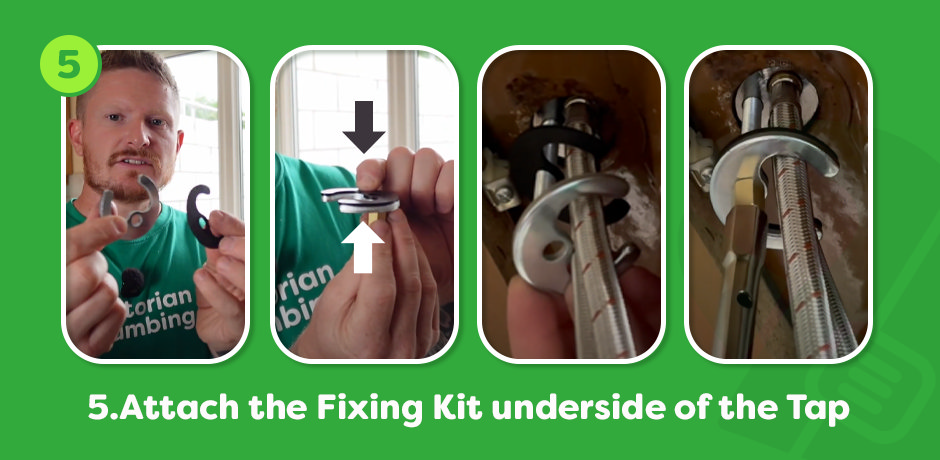
Moving to the underside of the tap, place both of the metal fittings for your tap over the threaded bar. Hand screw the nut onto the threaded bar, so the fittings are now secure, and then use a box spanner to further tighten the nut.
While you tighten the nut, your new tap might move about a little. Either ask someone for some help and have them hold the tap in place while you tighten the nut, or keep checking and moving it to the right position yourself between tightenings.
6. Connect the Tap to the Isolation Valve
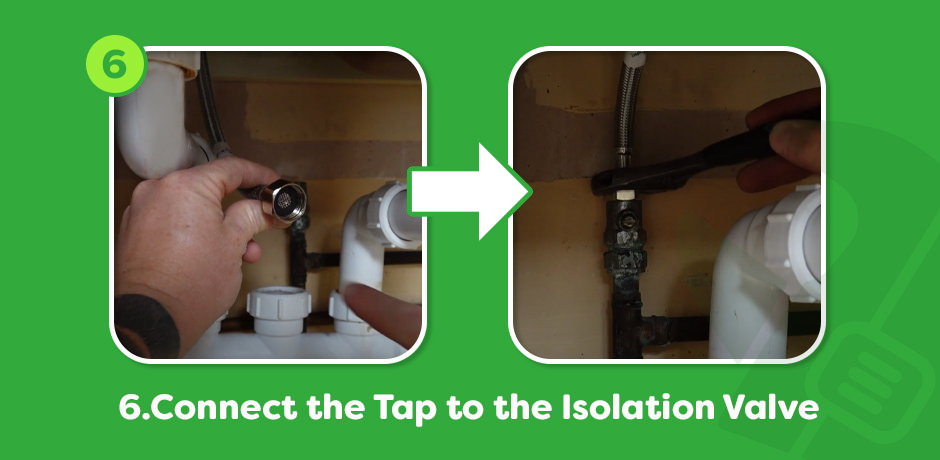
Connect your flexible tap connectors to the isolation valves under your sink, tightening them with a normal spanner. Make sure you connect both the cold and the hot connectors!
7. Turn the Water Back on and Test
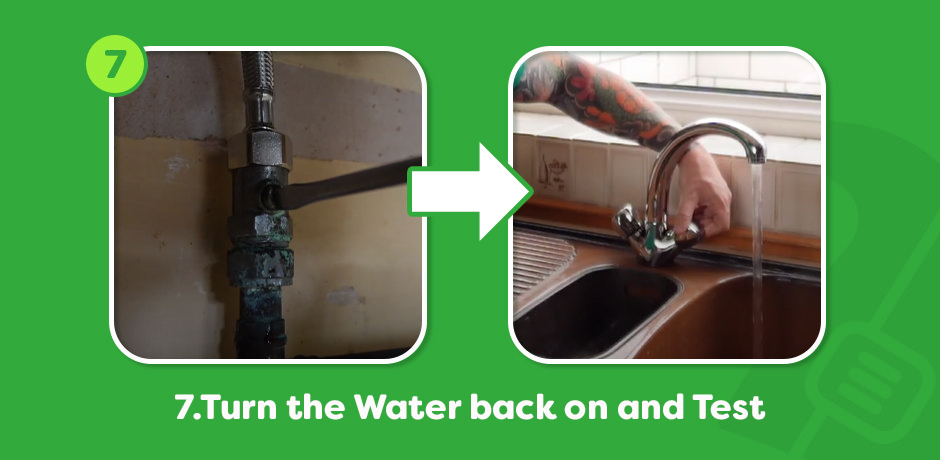
Now, you can turn the water back on and test out your new tap! Make sure to check both the tap itself and the cabinet underneath the tap for leaks.
Enjoying That New Tap Feeling?
If mastering fitting a new tap has got you in the DIY mood, then you might want to keep the momentum going with our guides on how to fit a bathroom sink and how to fix a dripping tap. You could also check through our range of taps for some kitchen remodelling inspiration!

Oskar
Oskar is one of our bathroom bloggers here at Victorian Plumbing and he loves inspirational bathroom designs! When not writing popular 'How To' step-by-step DIY guides, he is posting buying guides that give great advice on how to go about purchasing your items.
