Grab Up To 70% Off In Our January Sale!
Plus an extra 10% off our Arezzo range with code AREZZO10. Code ends in:
How to Fix a Dripping Tap
How to Fix a Dripping Tap
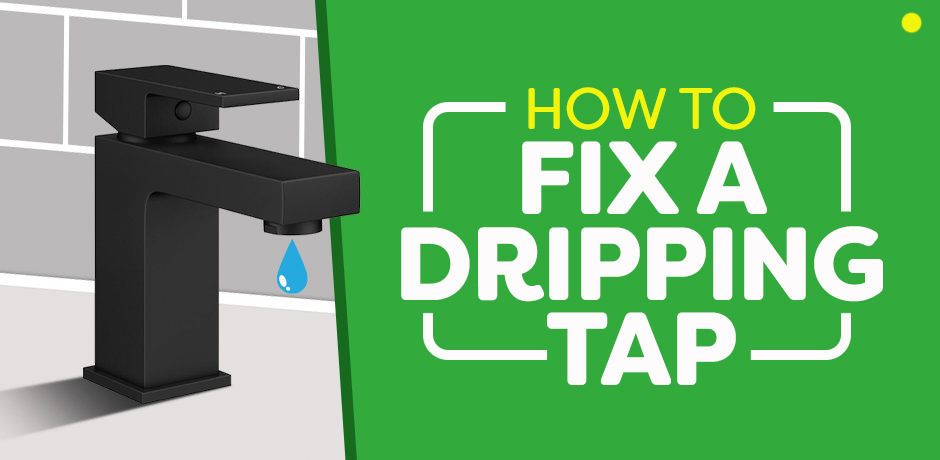
Noisy, wasteful and needlessly expensive, a dripping tap or mixer is one of the most common, and most fix-able, home plumbing problems.
Quick Jump Contents
- Why Taps Drip
- Tools & Parts Checklist
- How to Fix a Dripping Mixer Tap (Kitchen Guide)
- How to Fix a Dripping Bathroom Tap (Basin Guide)
- Troubleshooting Persistent Leaks
- Frequently Asked Questions
Drip, drip, drip…It starts as a tiny background noise, the sort you notice only when the house is quiet. Then you spot the tell-tale ripple in the sink and the guilty tap poised above it, wasting perfectly good water drop by drop. In a year that harmless-sounding trickle can add up to more than 5000L, enough to fill a paddling pool every single week, and if it’s the hot tap, you’re paying to heat every wasted drop. Worse still, the longer you ignore it the faster washers harden, cartridges scar under limescale and your water bill creeps ever higher.
The good news? Most dripping taps give up their secrets in under an hour with nothing more exotic than a spanner, a screwdriver and a couple of replacement parts that cost less than a round of coffees. In the guide that follows we’ll walk, step by step, through two of the most common fixes UK homeowners face: stopping a leak in a modern kitchen mixer tap by replacing its ceramic cartridge, and silencing the steady drip from a traditional bathroom basin tap by swapping out its worn rubber washer.
Why Taps Drip
Inside every tap is a seal that stops water when you close it. Older compression taps use a rubber washer; modern mono-bloc and single-lever mixers use ceramic discs housed in a cartridge. Over time, washers harden and split, while cartridges can be scarred by grit or clogged with limescale — especially in hard-water areas. The tell is simple: a drip from the spout points to a washer or cartridge; a leak around the handle usually means a tired O-ring. Resist the urge to wrench the handle tighter. Over-tightening won’t cure a failed seal and can speed up the damage.
Tools & Parts Checklist
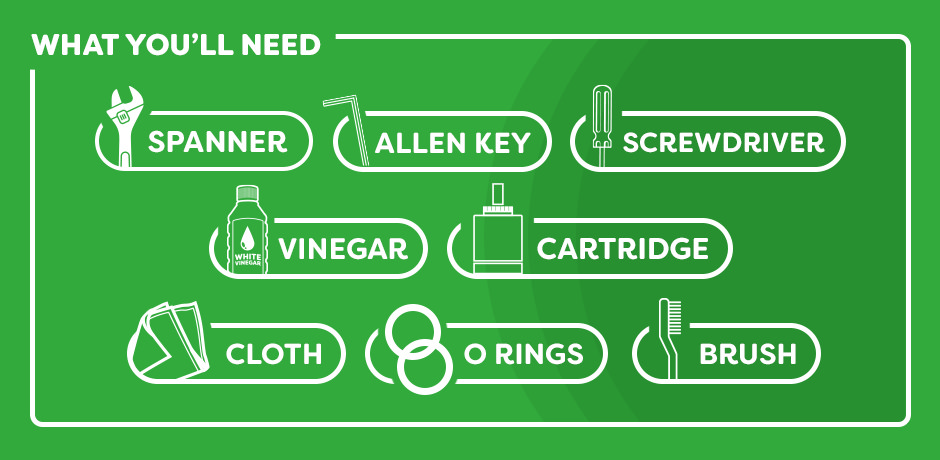
- Adjustable spanner or grips
- Flat-head & Phillips screwdrivers
- Allen (hex) keys for grub screws
- White vinegar for descaling
- PTFE tape (optional)
- Towels & basin plug to catch parts
Replacement parts:
- Ceramic cartridge for a dripping kitchen mixer tap
- ½-inch or ¾-inch tap washer for a basin/bath tap
- Spare O-rings
Fixing a Dripping Kitchen Mixer Tap (Ceramic Cartridge)
Most single-lever monobloc mixers in your kitchen use a ceramic disc cartridge to control flow. If water drips from the spout, that seal is either scaled up or worn. The fix is simple: clean the cartridge or replace it like-for-like with a quality, UK-appropriate part (WRAS-approved where possible).
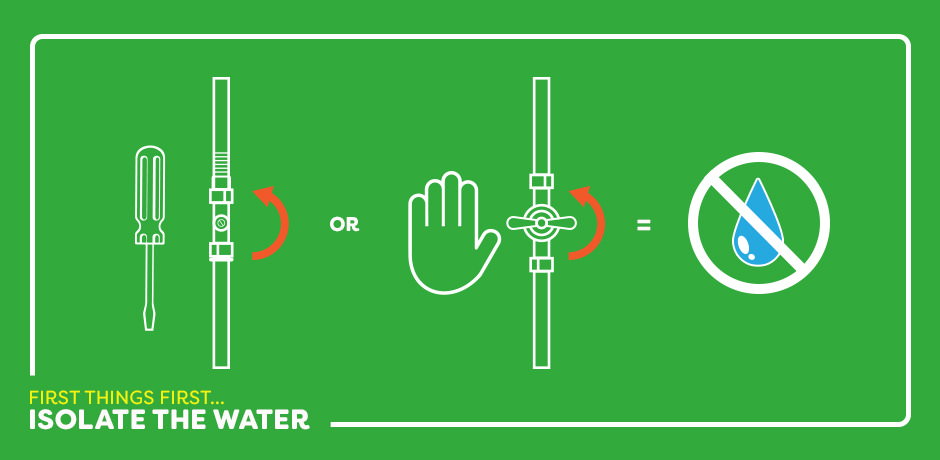
Step 1 — Turn Off the water
Close the hot and cold isolation valves under the sink. If you don’t have them, turn off the main stopcock. Open the tap to release pressure and check the supply is off.
Step 2 — Remove the Handle
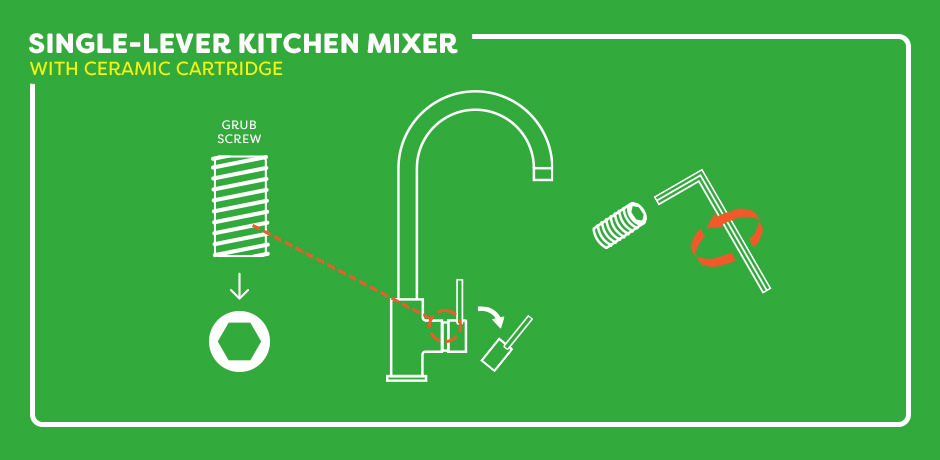
Plug the sink so small parts can’t drop away. Most levers are held by a tiny grub screw on the side or underside; loosen it with the correct Allen key and lift the handle off. If your tap has a red/blue cap on top, pop it off to reveal a screw, then remove the screw and handle.
Step 3 — Expose the Cartridge
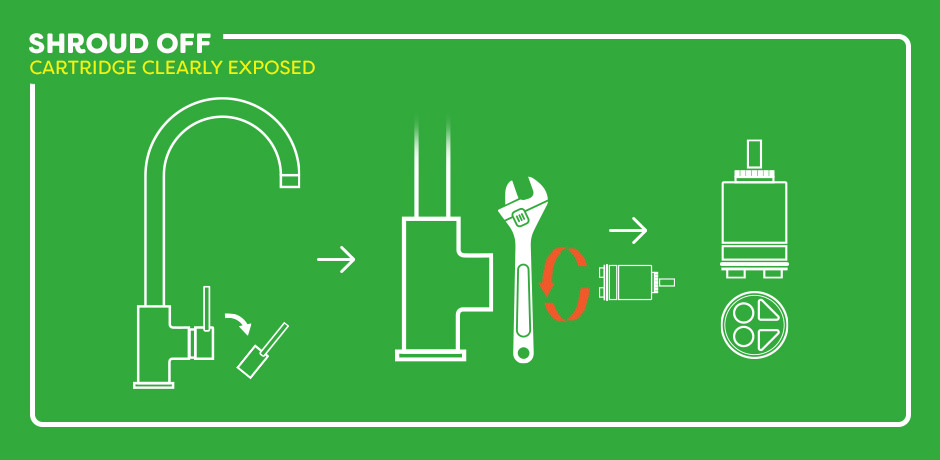
Unscrew any decorative shroud or collar by hand to reveal the cartridge and its retaining nut.
Step 4 — Free the Cartridge
Hold the tap body or spout to stop it twisting on the sink. Use an adjustable spanner to loosen the retaining nut anti-clockwise, then lift the cartridge straight out. A little water is normal.
Step 5 — Inspect and Clean
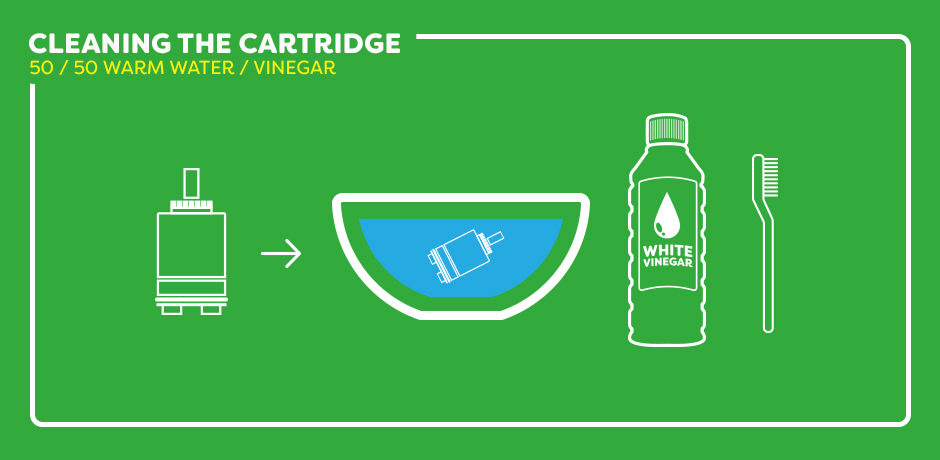
If the cartridge looks scaled rather than damaged, soak it for 10–15 minutes in a 50/50 mix of warm water and white vinegar, then brush away residue, rinse, and dry. Cracked ceramic discs or perished seals mean it needs replacing.
Step 6 — Match a Replacement (If Needed)
Cartridges aren’t universal. Match the spline pattern, overall height, and locating tabs, or use the tap’s model number. A good plumbing merchant can identify it if you bring the old one in.
Step 7 — Refit the Cartridge
Drop the cleaned or new cartridge into the body, aligning tabs with the internal slots so it sits flush.
Step 8 — Tighten the Retaining Nut
Screw the nut back on and nip it up snugly. Firm is enough—overtightening can damage brass threads or the cartridge.
Step 9 — Check O-rings
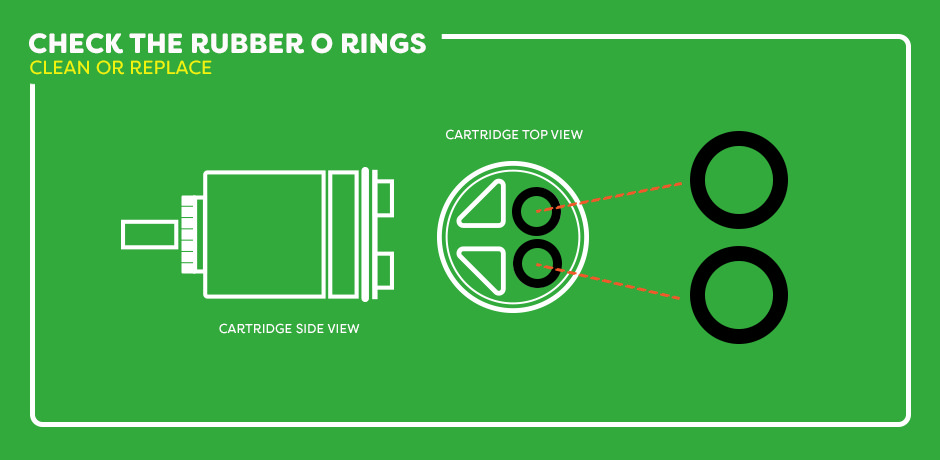
If you can see brittle O-rings on the cartridge or spout, replace them now and add a light smear of silicone grease.
Step 10 — Reassemble and Test
Refit the shroud and handle, then tighten the grub screw (or top screw) and press the cap back in. Turn the water on slowly, watch for leaks as the tap pressurises, then open and close the lever a few times. With the tap off, the spout should stay silent. If it still drips, move to the troubleshooting section to check for a mismatched cartridge or limescale in the body.
Fixing a Dripping Basin Tap (Rubber Washer)
Traditional pillar taps use a compression valve that presses a rubber washer onto a seat to stop the flow. When that washer hardens or splits, you get a drip from the spout. The cure is to swap the washer. It’s cheap, quick, and well within DIY. If your basin tap is quarter-turn with a lever, it likely uses a ceramic cartridge instead—follow the mixer-tap method for that. Leaks around the handle usually point to a tired spindle O-ring.
Step 1 — Turn off the water
Close the isolator under the basin with a flat screwdriver. If there isn’t one, turn off the main stopcock. Open the tap to drain pressure.
Step 2 — Protect the area
Pop a plug or cloth in the waste so tiny screws can’t disappear. Lay a towel around the tap to catch drips.
Step 3 — Remove the handle
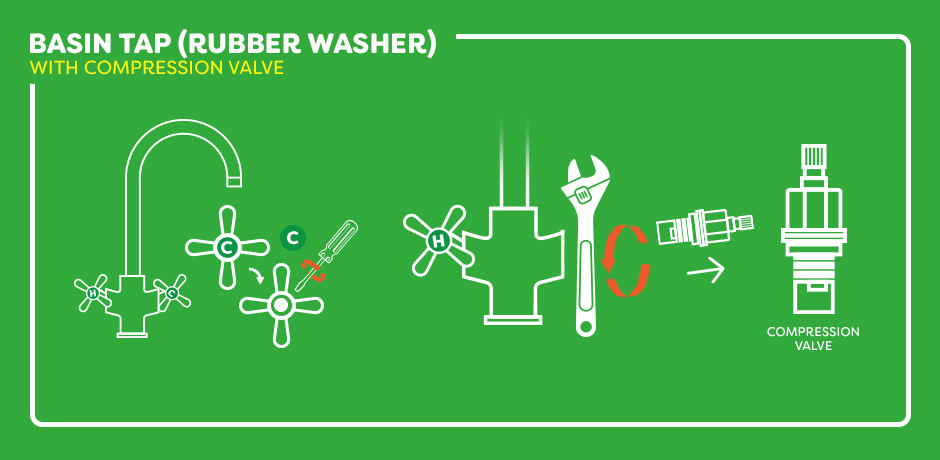
Pry off the hot/cold cap to reveal the centre screw. Undo it and lift the handle straight up. If there’s a bonnet or shroud over the valve, unscrew it by hand to expose the valve flats.
Step 4 — Remove the valve
Seat an adjustable spanner squarely on the valve flats. With your other hand, hold the tap body or spout steady so you don’t twist the pipework. Turn anti-clockwise to crack it loose, then spin it out by hand and lift the valve free.
Step 5 — Swap the washer
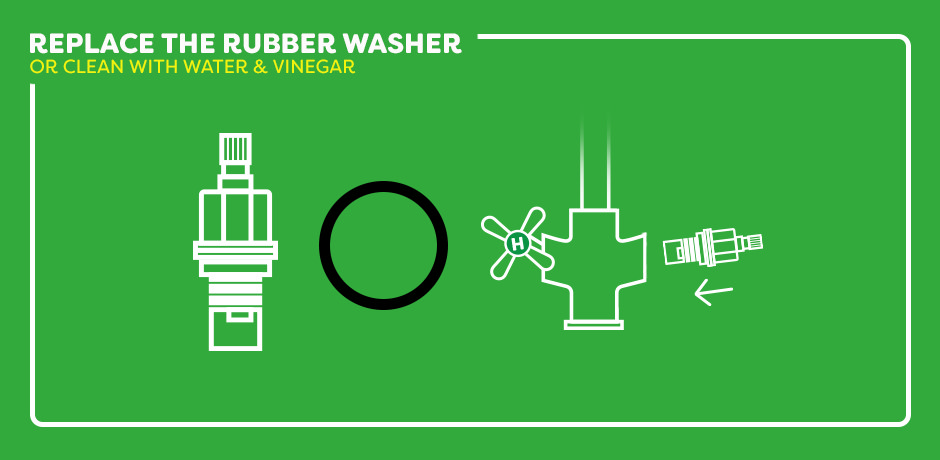
At the base of the valve you’ll see the rubber washer held by a small screw or clip. Remove the fixing, lift off the old washer, and fit a new one of the same diameter and thickness (most basin taps take ½"). Snug the retaining screw—no need to crank it. If you’re caught without a new washer, a quick vinegar soak can revive a chalky one as a temporary fix, but replacement is best.
Step 6 — Check the spindle O-ring
If water was also weeping around the handle, slide off the O-ring on the spindle and fit a matching new one. A tiny smear of silicone grease helps it seat and turn smoothly.
Step 7 — Reassemble
Thread the valve back into the tap body by hand first to avoid cross-threading. Tighten with the spanner until firm. Refit the shroud, handle, screw, and cap, aligning the handle so “off” is straight.
Step 8 — Restore supply and test
Open the isolator slowly. Bleed a little water to clear air, then close the tap and watch the spout. A silent pause means the seal is good. Wipe the area dry and check again after a minute.
If it still drips: confirm the washer size and seating, and check the valve seat inside the tap body. A scarred seat can let water past and may need a quick reseat with the proper tool. If threads look damaged or you can’t isolate the supply safely, call a qualified plumber
Troubleshooting Your Dripping Taps
If a new washer or cartridge doesn’t cure it, two issues top the list. First, a mismatched part: cartridges vary by height and spline count, and washers by diameter and thickness. Second, a scarred valve seat inside the tap body: a quick pass with a reseating tool restores a smooth sealing surface. Limescale can also clog cartridges beyond rescue, in which case replacement is quickest. Leaks around the handle point to O-rings; drips at the spout base can be from the spout O-rings on some mixers. If you spot hairline cracks, distorted threads, or you can’t isolate the supply safely, it’s time to call a qualified plumber.
Frequently Asked Questions
How long does the repair take?
Most first-timers finish in 30–60 minutes, including a careful leak check. Seized screws or stubborn valves can add time—go slowly and use the right tool.
What size washer do I need for a basin tap?
Most UK basin taps use a ½-inch washer; bath taps are often ¾-inch. Take the old washer with you and match both diameter and thickness.
How do I identify the correct mixer cartridge?
Remove yours and note any markings, spline count, and overall height. A good merchant can match it against reference guides. If you know the tap model, search by part number.
Can I stop a drip by tightening the handle harder?
No. Over-tightening accelerates wear and can damage the valve. Replace the failing seal instead.
Explore More Ways to Keep Every Drip in Check
With your tap now turning off as crisply as the day it was fitted, you’ve tackled one of the simplest yet most satisfying plumbing wins. Ready for the next project? Browse our DIY archive for step-by-step bathroom fixes.
If this guide helped, pass it on to anyone still living with an endless drip, because a quiet, efficient home is the kind of upgrade worth sharing.

Jack
Jack is part of the resident bathroom bloggers team here at Victorian Plumbing. As a bathroom décor and DIY expert, he loves writing in depth articles and buying guides and is renowned for his expert 'how to' tutorials.
